If you want to migrate PrestaShop store to a new version, you are at the right place. Using the PS Migrator module simplifies the overall migration process even for those with very little technical knowledge.
Many of you ask why updating your PrestaShop store to the latest version is important? Well, to answer this question, you need to know that PrestaShop regularly releases new versions having more enhancements, security patches, and performance improvements. By updating to the latest version, your store benefits from these advancements and gets more security from malwares. This way, you are able to provide a better experience for your store customers.
One of the primary reasons to update your PrestaShop store is to get more security. Cyber threats are increasing at a rapid pace and older versions of software can become vulnerable to attacks. Therefore, you should try to keep your store updated and protect sensitive customer data along with your online reputation.
Then we also have performance improvements as one of the major reasons to update. Each new version of PrestaShop comes with optimizations that can make your store run faster and more efficiently. This will improve the user experience and also attract more visitors to your site. Whether it’s improved payment gateways, advanced analytics, or better mobile view, you get to enjoy these perks after migrating to the latest version.
Here’s a step-by-step guide to help you through the migration process using PS Migrator.
Paso 1: Prepara tu tienda actual
Before starting the migration, it’s very important to prepare your existing PrestaShop store. Follow these steps to ensure a smooth transition:
1. Backup Your Data: Make a complete backup of your store’s database and files. This is essential to prevent data loss in case something goes wrong during the migration.
2. Update PrestaShop: Ensure that your current store is running on the latest version of PrestaShop. This minimizes compatibility issues with the PS Migrator module.
3. Check Module Compatibility: Verify that all your installed modules and themes are compatible with the version of PrestaShop you are migrating to.
Paso 2: Instalar el Módulo Migrador PS
To install the PS Migrator module, follow these steps:
1. Download the Module: Get the PS Migrator module from the official PrestaShop Addons Marketplace or the developer’s website.
2. Upload the Module: In your PrestaShop admin panel, go to «Modules and Services» and click on «Upload a Module.» Select the downloaded PS Migrator module file and upload it.
3. Install the Module: Once uploaded, find the PS Migrator module in the list of available modules and click «Install.»
Paso 3: Configurar el Módulo Migrador PS
After installing the module, you need to configure it to suit your migration needs:
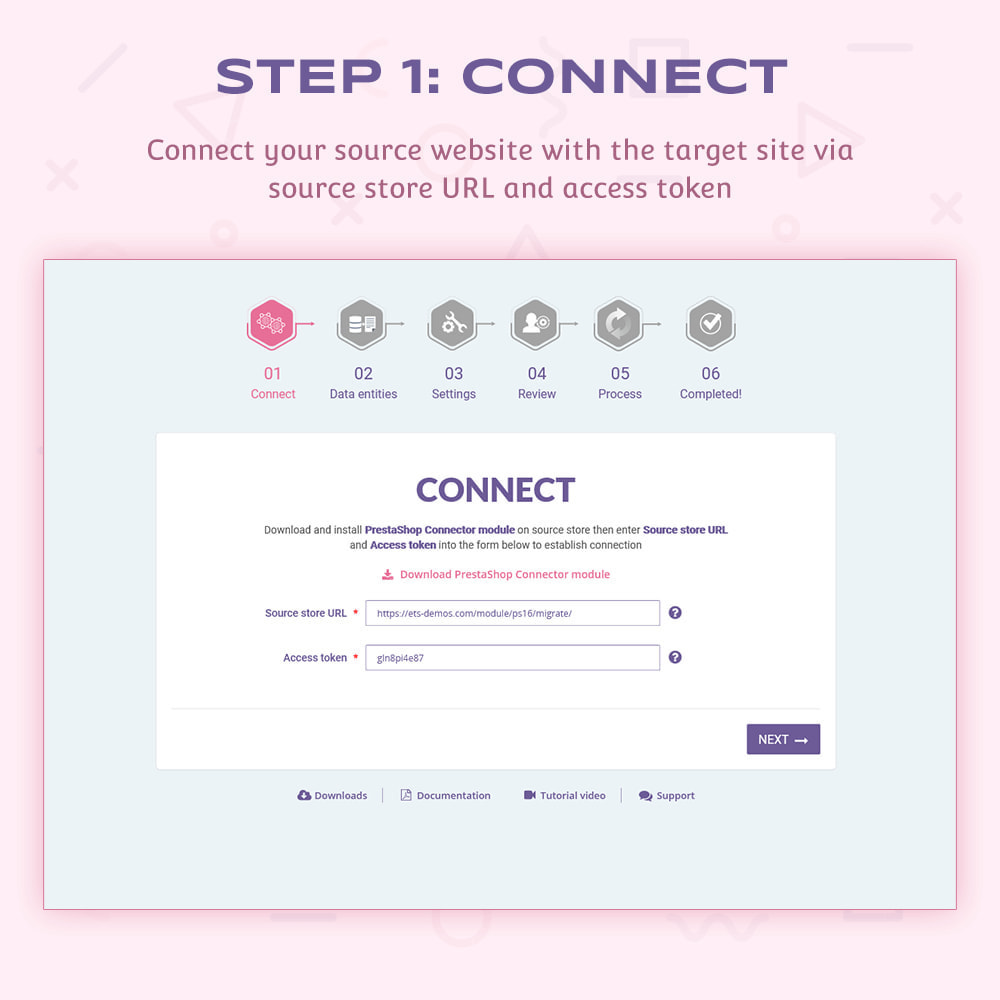
1. Access the Configuration: Navigate to the «Modules and Services» section, find the PS Migrator module, and click «Configure.»
2. Set Migration Preferences: Specify the details of your migration, such as the source and target versions of PrestaShop. You may also need to enter credentials for your current store’s database.
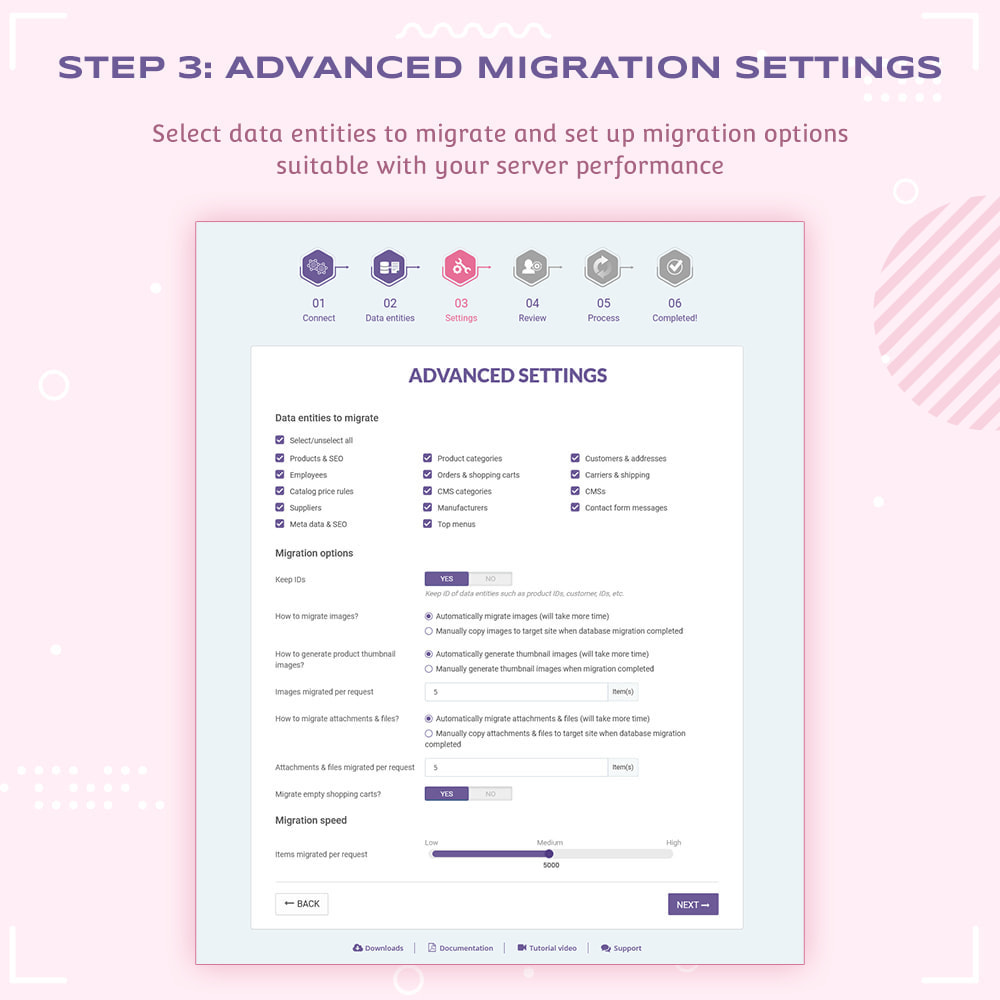
3. Select Data to Migrate: Choose the data you want to migrate. This can include products, categories, customers, orders, and more.

4. Advanced Migration Settings: You can also opt for Advanced settings by selecting or deselecting the things you want to migrate.
Paso 4: Realizar la migración
With the configuration complete, you can now proceed with the migration:
1. Start the Migration: Click the «Start Migration» button in the PS Migrator module interface. The module will begin transferring your data from the old store to the new version.
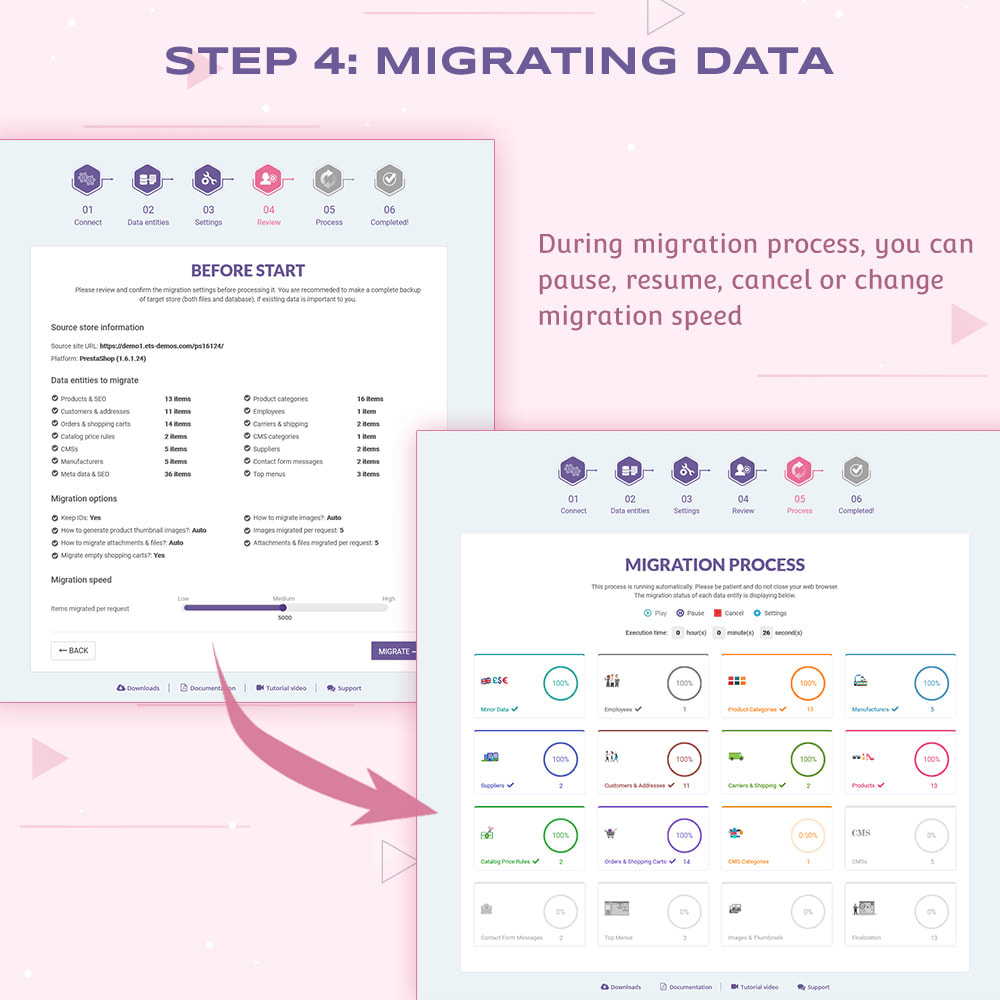
2. Monitor the Process: Keep an eye on the migration process. The module will display progress indicators and any errors that may occur. Address any issues promptly to avoid complications.
Paso 5: Tareas posteriores a la migración
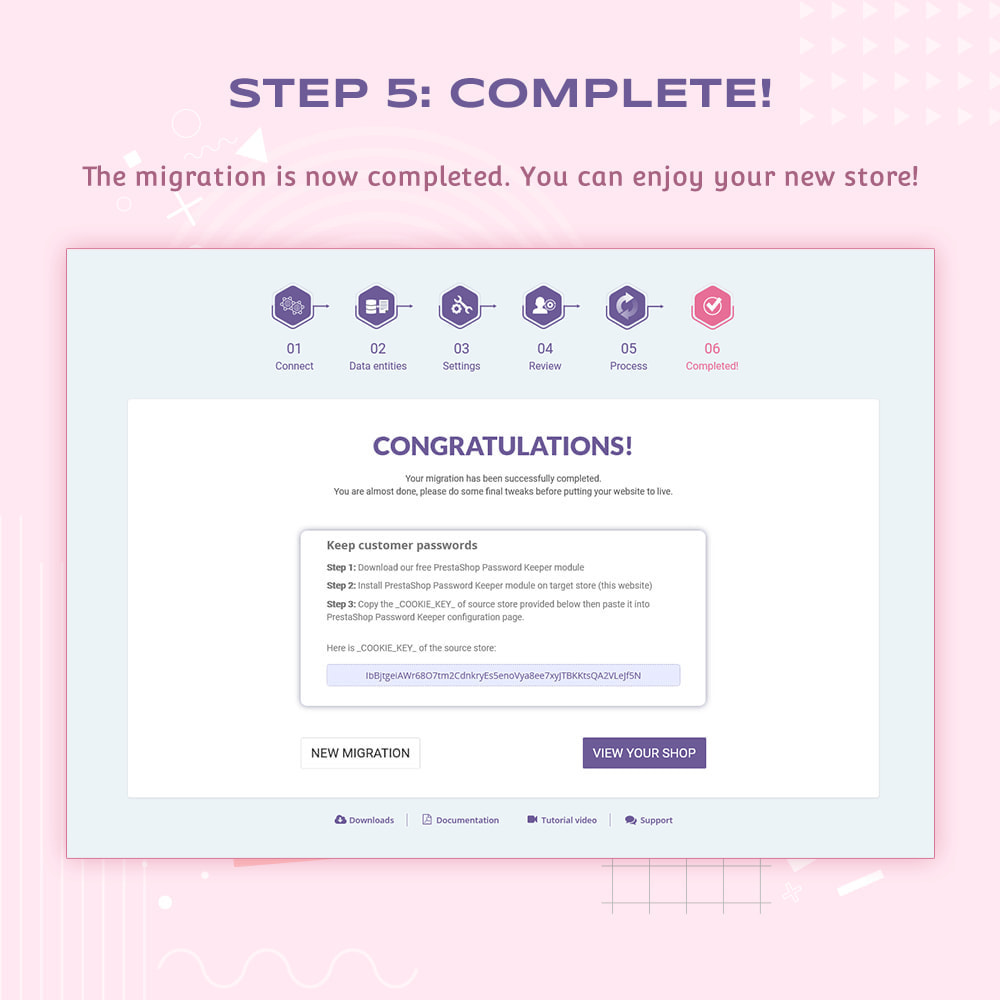
Once the migration is complete, there are a few final tasks to ensure everything is working correctly:
1. Verify Data Integrity: Check that all your data has been transferred accurately. This includes products, categories, customer details, and orders.
2. Test Your Store: Thoroughly test your new store to ensure all functionalities are working as expected. This includes checking the front-end, back-end, and any integrated modules.
3. Update URLs and Links: If there have been any changes to your store’s URLs, update them accordingly. This helps maintain SEO rankings and prevents broken links.
Conclusión
You can easily migrate your PrestaShop store using the PS Migrator module. This not only helps to streamline the process but also reduces any risks associated with the migration. By following these steps, you can easily get a smooth transition to the latest version of PrestaShop. This will help you to keep your store up-to-date and run it smoothly. Remember to backup your data before the migration and carefully configure the module. Once the migration process is complete, thoroughly test your store after migration.
If you want a tutorial video highlighting all the above-mentioned steps, you can watch it here.


